THE AMERICAN CIVIL WAR GAMING CLUB
Competition - honor - friendship
camaraderie - respect - challenge


Est.
1997

Campaign Franklin is a game which is often overlooked and ignored as it features some very 'lopsided' battles where the Confederates have only the most remote chance of victory. And there isn't really much I can add to refute that fact. Both historical large battles in this game, Franklin and Nashville, are almost slam-dunk Union victories. But there are alternative scenarios and shorter scenarios which even up the odds some and make them more playable for the Confederates. While this title will never rival others for top notch content it does deserve to be picked up and played a little more than it is. Here are my picks to play in the Campaign.
CONTENT
17 Total Scenarios Recommended
4 Rated "Excellent"
NOTE: ALL NUMBERS HERE REFLECT THE ACTIVE STRENGTHS OF THE ARMIES. THESE NUMBERS DO NOT INCLUDE PERMANENTLY FIXED UNITS.
23 Turns
01 - Columbia
My Rating: Good
18,245
17,395
0
850
34
TOTAL
Infantrymen
Cavalrymen
Artillerymen
Cannons
21,189
20,289
0
900
36
Description - (What If: 23 Turns) What if Hood had changed his plan and instead kept his army concentrated around Columbia. Schofield, fearing that Confederate infantry had moved north, orders Wagner's Division to Spring Hill and moves Kimball's Division back to where the Columbia & Franklin Pike crosses Rutherford's Creek. When Forrest reports that a Federal Column can be seen marching north along the Columbia & Franklin Pike, Hood makes a bold decision to force a crossing over the Duck River and attack the Union Forces remaining north of Columbia.
Analysis - This scenario is a straight-ahead attack on the Union forces north of Columbia. A fun scenario and one sure to be bloody from the start.

36 Turns
05 - Columbia V.4
My Rating: Good
24,975
23,475
0
850
34
TOTAL
Infantrymen
Cavalrymen
Artillerymen
Cannons
32,226
27,216
2,310
900
36
Description - (What If: 36 Turns) This scenario supposes that Schofield was unable to fire either bridge across the Duck River after his evacuation of Columbia. Having decided to adhere to Thomas' instructions to hold the Confederates on the south side of the Duck River, Schofield is now prepared for a formable defense. Meanwhile, Hood has sent Forrest east and across the river in hope of drawing Schofield's attention while he consolidates the main army around Columbia. Just before sunrise on the 29th of November, an eager Hood launches his attack against what he hopes will be a confused and weaken Union force.
Analysis - This sets up as a bloody scenario for both players. There are enough strategic options for both sides to keep this one interesting from start to finish.

8 Turns
09 - Spring Hill (Hist)
My Rating: Good
8,175
5,957
0
650
26
TOTAL
Infantrymen
Cavalrymen
Artillerymen
Cannons
15,603
14,048
1,555
0
0
Description - (Historical: 8 Turns) By 3 p.m., Forrest's cavalrymen had already fought for several hours and were low on ammunition when the leading elements of the Hood's striking column reached Rutherford's Creek some 2 1/2 miles southeast of Spring Hill. Soon after, Hood issued orders for Cheatham to cross Rutherford's Creek and attack Spring Hill. Stewart's corps was ordered to deploy as support for Cheatham's left flank. As Cheatham's corps waded across and began to form their battle line, Hood, having surveyed the Union position from a hill southeast of town, had already revised his plans. Unfortunately, his new orders to redirect the attack and sever the Columbia & Franklin Pike failed to reach all of his general staff (one of many unfathomable Confederate command and control mishaps that would occur that day). Now, as the precious light of day fades away, Cleburne's division has found the enemy and strikes. Note: Brown's and Bate's division do not participate and set up where they would have ended.
Analysis - This short chaotic skirmish is actually kind of fun. Essentially, this battle is between 10,500 Rebels and 8,175 Federals because of time and arrival issues. The Yankees have a few advantages but the Rebels have far more units with which to move. With just a few turns before nightfall, this one doesn't allow much real action. But it can still be a fun and fast game if you are looking for that type of scenario.

15 Turns
11 - Spring Hill V.2
My Rating: Good
26,664
23,889
1,275
1,500
60
TOTAL
Infantrymen
Cavalrymen
Artillerymen
Cannons
34,882
26,958
5,524
2,400
96
Description - (What If: 15 Turns) Schofield spends most of the morning pulling his entire force back to Spring Hill. Hood quickly follows and by early-afternoon of November 29, he orders and all out assault against what he hopes is a very disorganized army in retreat. This scenario also supposes that Wilson's cavalry properly protected Schofield's left flank as he fell back.
Analysis - This is basically the Battle of Franklin except at Spring Hill. A massed Confederate assault against an entrenched enemy position on good ground. So, why do I include it here? It's still better than the actual Franklin!

75 Turns
19 - Spring Hill V.10
My Rating: Excellent
35,422
26,963
6,309
2,150
86
TOTAL
Infantrymen
Cavalrymen
Artillerymen
Cannons
35,820
28,026
6,394
1,400
56
Description - (Historical: 75 Turns) In this historical variant of Spring Hill, the chase is on. As the Union, you must hold Spring Hill long enough for the army to pass onto Franklin. As the Confederate commander, you must stop the Union army from joining General Thomas at Nashville.
Analysis - An interesting setup and one that can go a lot of different directions based on the decisions the commanders make early on. Large victory point hexes need to be considered during the battle as does the eventual arrival of very effective and well-armed Union cavalry. Play it if you are looking for something a little different in the Campaign Franklin series.

10 Turns
20 - Franklin (Hist)
My Rating: Poor
28,951
23,852
3,699
1,400
56
TOTAL
Infantrymen
Cavalrymen
Artillerymen
Cannons
27,782
21,018
6,214
550
22
Description - (Historical: 10 turns) Having missed his golden opportunity to destroy Schofield's retreating Corps at Spring Hill, Hood was determined to destroy it in front Franklin. This time an all out assault was ordered. Can the Union hold their postions or will the Rebel yell prevail? The date is November 30th 1864, the place is Franklin, Tennessee. Let the Battle begin!
Analysis - If you are a Rebel - there isn't much reason to play this one unless you really want to only fight the historical scenarios. Look at the alternate Franklin scenarios for better options.

13 Turns
21 - Franklin V.1
My Rating: Good
29,735
24,527
3,708
1,500
60
TOTAL
Infantrymen
Cavalrymen
Artillerymen
Cannons
27,869
21,111
6,208
550
22
Description - (What If: 13 turns) Historically, Forrest objected to Hood's plan for an open ground frontal assault against a Union fortified position and instead offered to "flank the Federals from their works" if Hood would give him one strong division of infantry with his cavalry. What if Forrest was able to persuade Hood but instead of a division Hood gave him a corps?
Analysis - This is a fun setup which moves the action to the east of the Harpeth River. It is still a tough one for the Rebels though.

21 Turns
24 - Franklin V.4
My Rating: Good
29,719
24,520
3,699
2,400
60
TOTAL
Infantrymen
Cavalrymen
Artillerymen
Cannons
29,222
26,822
0
1,500
96
Description - (What If: 21 turns) Variation of "Forward To The Works" that has random arrival times for A. J. Smith's divisions and a slightly modified Confederate setup.
Analysis - Do you like to gamble? Try this one. The Confederates are positioned with a chance - albeit not a great one - to break Schofield's lines at Franklin. The repositioning of Lee's Corps to the west of town places them on the Union's weakest part of the line.

19 Turns
29 - Franklin V.9
My Rating: Excellent
37,645
32,437
3,708
1,500
60
TOTAL
Infantrymen
Cavalrymen
Artillerymen
Cannons
35,530
26,806
6,224
2,500
100
Description - (What If: 19 turns) Hood decides not to attack the well-fortified Federal position and to instead wait for Lee's corps to come up. Meanwhile, Schofield has decided to stand his ground and with the arrival of A. J. Smith's divisions from Nashville overnight elects to attack the Confederates on the morning of December 1.
Analysis - A surprisingly fun twist on Franklin. In this setup the Confederates are the defenders behind breastworks and the Federals are attacking them. While it might sound like an easy Rebel victory at first, you have to take into consideration that the Yanks have the interior lines and are massed while the Confederates are spread out with no real way to move parallel along their lines. This scenario requires both sides to think quite a bit more than they might expect to.

36 Turns
34 - Franklin V.14
My Rating: Good
29,004
23,796
3,708
1,500
60
TOTAL
Infantrymen
Cavalrymen
Artillerymen
Cannons
35,479
26,857
6,222
2,400
96
Description - (What If: 36 turns) Schofield decides to abandon the fortifications erected by Cox on November 30th and take a permanent position on the north side of the Harpeth River and await reinforcements from Nashville. Hood reaches Franklin by mid-afternoon but decides to wait for Lee to come up. The next morning Hood orders an assault against the Union positions along the Harpeth River. NOTE: This scenario assumes that the crossings north of Franklin were not fired.
Analysis - This one could go either way for the Rebels - tons of fun or a nightmare. The Yankees have good positions overall. Can the Rebels turn their flank? A challenging scenario to say the least.

21 Turns
37 - Overall's Creek (Hist)
My Rating: Good
3,438
3,237
51
150
6
TOTAL
Infantrymen
Cavalrymen
Artillerymen
Cannons
6,900
4,751
2,099
50
2
Description - (Historical: 21 Turns) On December 7th, 1864, General Nathan Bedford Forrest set a trap for Union forces advancing from Murfreesboro, Tennessee. On a mission from his commander, General John Bell Hood, to destroy Union positions south of Nashville, Hood and his lean force had attracted the attention of two Union brigades led by General Robert Milroy. As Confederate infantry waited behind quickly constructed emplacements and Confederate cavalry waited in nearby woods to ambush the Union force, Milroy diverted his forces unseen around the flank of the Confederates throwing them into confusion. As the Union lines advanced, the Confederate infantry, unsure of friend and foe, fled to the supreme disgust of Forrest. The Confederate cavalry's role changed from trapper to savior as a charge ordered by Forrest momentarily halted the advancing Union infantry and allowed the Confederates to make their retreat. This Confederate defeat greatly lessened the pressure Hood was able to place on his Union counterpart Thomas.
Analysis - This one should be an "easier" win for the Confederates. The Union has two large brigades but only seven regiments on the field. But their regiments are larger than the Rebel brigades here.

86 Turns
42 - Nashville (Hist)
My Rating: Poor
47,142
40,103
5,114
1,925
77
TOTAL
Infantrymen
Cavalrymen
Artillerymen
Cannons
22,999
18,533
2,241
2,225
89
Description - (Historical: 86 Turns) Just two days before, General Thomas' army was ice-bound and prevented from carrying out General Grant's stern order to advance on Hood's Army of the Tennessee. Finally, all was ready and the order to attack could no longer be delayed. Federal troops were ordered to take their pre-attack positions on this foggy morning and prepare to advance into what history would later call "The Decisive Battle of Nashville."
Analysis - This is another historical battle scenario that has no real charm for a Confederate player. I'd recommend one of the alternate scenarios over this historical one.

66 Turns
49 - Nashville V.6
My Rating: Good
41,504
39,979
0
1,525
61
TOTAL
Infantrymen
Cavalrymen
Artillerymen
Cannons
23,635
19,119
2,241
2,275
91
Description - (What If: 66 Turns) When Thomas finally did attack on December 15th, his initial attack fell on thin air: the previous advance positions of the Confederate army. What if Hood's army was still there? Could that have had a signficant impact on the outcome of the battle? This scenario assumes that Thomas, fearful of Forrest, sent Wilson and his cavalry to prevent Forrest from entering the battle, so neither are present. Also, Cockrell's brigade was recalled and present.
Analysis - With no Federal cavalry on the field the sides are much more even (all things considered). If you want to play a fairer version of the two-day Nashville battle than this is for you.

34 Turns
51 - Nashville V.8
My Rating: Excellent
47,142
39,528
5,114
2,500
100
TOTAL
Infantrymen
Cavalrymen
Artillerymen
Cannons
29,002
20,011
6,416
2,575
103
Description - (What If: 34 Turns) General Thomas planned on a double envelopment of the Confederate position when he attacked on December 15th. With the Confederates in a weakened state, could a frontal attack that day have broken their lines and ended the battle in a single day? Hood, however, sensed that Thomas might take advantage of his weakened condition and two days earlier recalled all forces to combat this new threat.
Analysis - It doesn't get much better for the Confederates than this at Nashville. With only a single day to do battle the Confederates can possibly hold out. Play it if you have an itch for a shorter Nashville scenario better with a better balance.

36 Turns
54 - Nashville V.11
My Rating: Good
40,836
39,311
0
1,525
61
TOTAL
Infantrymen
Cavalrymen
Artillerymen
Cannons
29,552
20,011
6,416
3,125
125
Description - (What If: 36 Turns) Thomas was slow to move out after the Confederates arrived at Nashville. Perhaps a more aggressive commander would have been impatient to advance and stop the Army of the Tennessee once and for all. But in his haste, Wilson wasn't prepared and his cav was left behind. This scenario assumes the Union plan is to strike at the Confederate Right flank while the Confederates are in an advanced position. This scenario has Hood's army consolidated and ignores the Murfreesboro side show.
Analysis - This setup represents the "best" option from the Confederate point of view at Nashville. The Federals have no cavalrymen but still maintain their overall advantage in numbers. Can the Confederates actually win?

30 Turns
56 - Nashville V.13
My Rating: Excellent
34,077
32,702
0
1,375
55
TOTAL
Infantrymen
Cavalrymen
Artillerymen
Cannons
26,201
17,537
6,389
2,275
91
Description - (What If: 30 Turns) Early in the morning of the 16th, Thomas hears that Forrest is on his way and sends Wilson to intercept. Unfortunately for Thomas, Forrest sneaks past Wilson's cavalry and not only avoids a fight with Wilson, but arrives on the Nashville battlefield to maybe turn the tide. Will Thomas be shaken and forced to retreat back to Nashville?
Analysis - In this battle the arrival of Forrest throws everything to chaos on day two of the battle.

30 Turns
057 - Nashville V.14
My Rating: Good
34,077
32,702
0
1,375
55
TOTAL
Infantrymen
Cavalrymen
Artillerymen
Cannons
21,093
17,537
1,581
1,975
79
Description - (What If: 30 Turns) Wilson's cavalry was instrumental in turning the flank of Hood's army and causing a massive rout. What if Wilson and his cavalry were not present for this second day of battle and Hood more heavily fortified his position? Could Hood have survived another day with his army intact?
Analysis - A decent setup - from the Confederate point of view at least. This is a little tougher for the Federals but they still have a large numerical advantage.

12 Turns
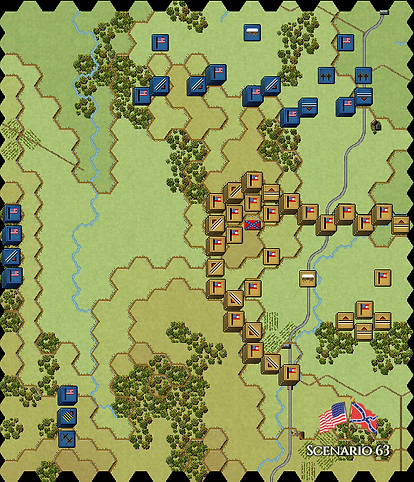
63 - Nashville V.20
My Rating: Good
10,387
8,841
1,271
275
11
TOTAL
Infantrymen
Cavalrymen
Artillerymen
Cannons
9,587
8,912
0
675
27
Description - (Historical: 12 Turns) After several hours, General Hood depleted the vital western flank perimeter and Bate was left with the impossible task of holding the hill top. Can it be done?
Analysis - Ironically this "impossible task" seems pretty simple for the Rebels. Evenly matched sides with the Confederates having interior lines, better troops, far more regiments, and more artillery. Thanks! This is about the only Nashville scenario I look at as leaning heavily in the Confederate favor.